REVIEW · OSAKA
Osaka Photography Masterclass – Private Photography Lesson
Book on Viator →Operated by Aperture Tours · Bookable on Viator
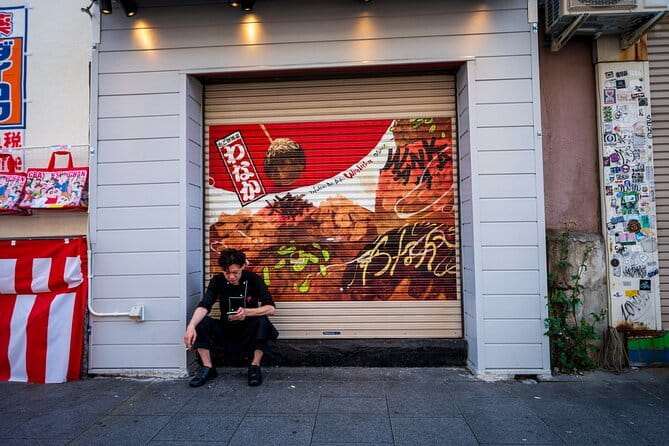
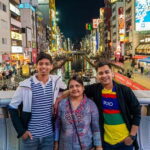
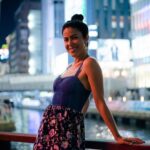
Neon streets make better teachers than textbooks. This private Osaka masterclass runs about 3 hours and walks you through the photo hotspots and angles that make Shinsekai and Dotonbori look so dramatic on camera. I like the hands-on focus on camera settings and composition, and I like how the plan shifts by day vs night so you learn the right techniques for neon, reflections, and motion. One drawback: you need to bring your own camera/phone, since camera gear and a tripod are not included.
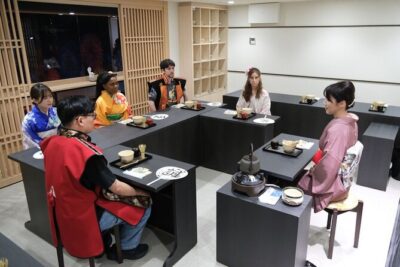
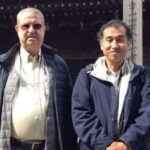
A big part of the value here is local direction. You’re not just dropped in front of famous signs; you’re led to where the light falls and where the scene will actually photograph well. In particular, the photographer guide Irven has a strong reputation for slowing down, explaining what’s happening at each stop, and pointing out smaller streets that change the look of your pictures.
If you’re expecting a long sightseeing tour with casual photo tips, you may feel it’s a bit more intense than that. But if you want to leave with better technique and a tighter photo plan for Osaka, this one is built for you.
In This Review
- Key highlights
- Osaka photo masterclass: what you’re actually paying for
- Day tour plan: Shinsekai mood to Dotonbori neon
- Shinsekai and Tsutenkaku: learning how Osaka can frame itself
- Dotonbori in the day: making neon work even before night
- Night tour plan: long exposure where the light is already doing the work
- What you’ll practice: motion, reflections, and cleaner night color
- Why the canal setting matters (and how you can use it)
- How the instruction works: settings and composition that translate
- If you’re using a phone: the lessons still apply
- If you’re using a DSLR or mirrorless: expect hands-on thinking
- What to bring (and how to plan your gear time)
- Price and value: is $170 worth a 3-hour private lesson?
- Who this tour suits best (and who might feel underwhelmed)
- Should you book Osaka Photography Masterclass?
- FAQ
- FAQ
- How long is the Osaka Photography Masterclass?
- Is this tour private or shared?
- Where does the tour start and end?
- Do I get to choose between a day tour and a night tour?
- What areas are covered during the day tour?
- What areas are covered during the night tour?
- Is a camera or tripod included?
- What’s included in the price?
- Is there free cancellation?
Key highlights
- Day route hits Shinsekai and Tsutenkaku, then lands in Dotonbori for neon signage and bold street compositions
- Night route focuses on neon, canal reflections, and long-exposure practice
- You get personalized instruction on settings and composition, not generic advice
- Private setup means you can move at your pace and linger when a shot clicks
- Guide Irven is praised for explaining scenes and taking time with each stop
- Best value if you already know your basics, but the session still teaches
Osaka photo masterclass: what you’re actually paying for
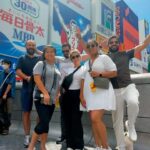
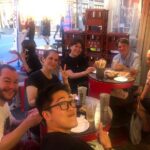
At $170 per person for about 3 hours, you’re paying for focus. This isn’t a big group event where one instructor tries to help 20 people shoot the same corner. It’s a private tour with a local guide plus a professional photographer guide, which means your questions and your camera approach can shape the session.
The other reason this pricing makes sense: Osaka lighting is tricky. Daytime can be bright and contrasty; night is a mix of neon colors, wet-looking reflections, and fast-moving crowds. A good teacher saves you time by telling you what settings to try and where to stand for cleaner frames. The itinerary is built around that idea, with Shinsekai and Tsutenkaku for daytime mood and Dotonbori for night neon and long exposures.
There are also small details that add up to a smoother experience: the tour offers a mobile ticket, and there are group discounts. Plus, you typically book around 72 days in advance, which is a quiet hint that these photo sessions fill up during popular travel windows.
You can also read our reviews of more private tours in Osaka

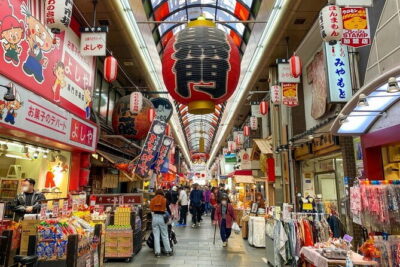
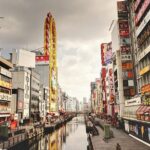
Day tour plan: Shinsekai mood to Dotonbori neon
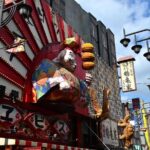
The day version is designed like a photo course with two chapters. You start in Shinsekai, known for a more nostalgic, character-filled streetscape and for the iconic Tsutenkaku Tower. Then you transition to Dotonbori, where neon signage and striking architecture give you tons of subject options.
Shinsekai and Tsutenkaku: learning how Osaka can frame itself
In Shinsekai, you get a useful mix of textures and shapes that photograph well in daylight. This is where you can work on:
- finding strong lines and angles (so your shots feel composed, not accidental)
- handling bright signage without washing out details
- using foreground elements to add depth around Tsutenkaku
A practical win here is pacing. The route gives you time to build a mini “shot set” from one area before moving on. That matters because composition skills improve when you repeat choices and adjust, rather than constantly jumping to new locations.
Dotonbori in the day: making neon work even before night
Dotonbori is famous for its night look, but during the day it still offers bold geometry and photo-worthy details. You can practice:
- balancing a high-contrast scene (bright signs vs darker streets)
- keeping your subject clear when there’s lots happening in the frame
- selecting camera angles that make architecture and street life look intentional
One common frustration in busy areas is getting a good image but with visual clutter. The tour’s focus on composition helps you make cleaner decisions fast—what to include, what to cut, and how to guide the viewer’s eye.
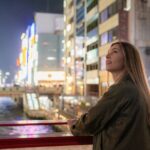
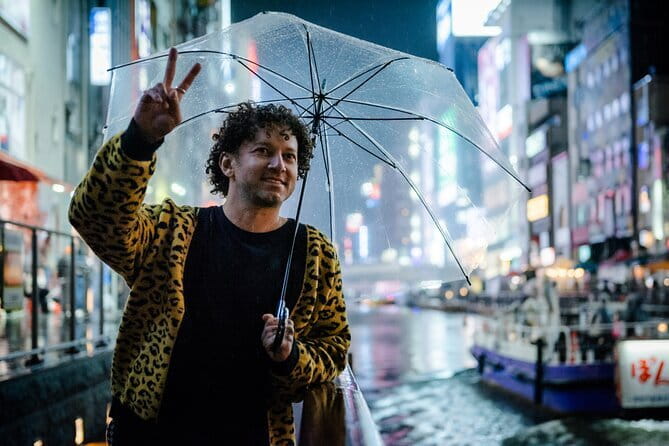
Night tour plan: long exposure where the light is already doing the work
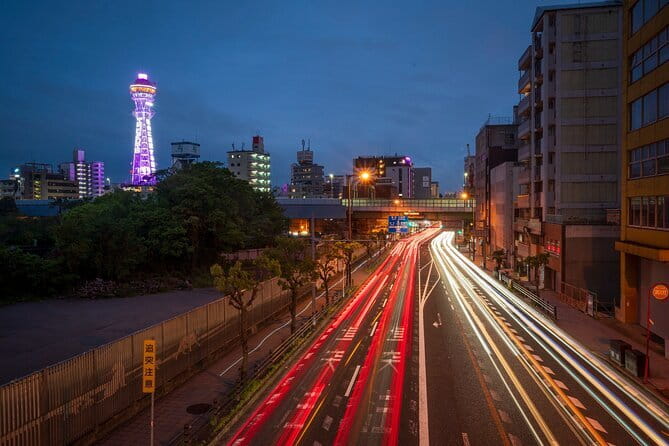
The night version is where Osaka really flexes. The route stays centered on Dotonbori, because it’s a practical classroom for night photography: neon signs, canal views, and dense street activity give you subjects for both sharp frames and long exposure experiments.
You can also read our reviews of more photography tours in Osaka

What you’ll practice: motion, reflections, and cleaner night color
Night photography often fails for two reasons: camera settings don’t match the scene, or the framing is too chaotic. This tour is set up to teach you how to handle both.
You’ll focus on capturing:
- long exposure effects, especially with bright neon sources
- reflections, where street light bounces off surfaces near the canal
- motion in the city, so people don’t just look like blurry accidents
Instead of telling you to just shoot and hope, the photographer guide aims to help you learn what you’re changing. That’s the difference between taking 50 photos and building a skill you can repeat later.
Why the canal setting matters (and how you can use it)
The canal isn’t just scenery. It’s a built-in light reflector. That gives you stronger opportunities for reflections than you’d get in most urban streets. If you’re thinking about night shots, you’ll often get your best results when you match your framing to that reflective surface—then adjust shutter speed to control how the light streaks.
How the instruction works: settings and composition that translate
A big promise of this experience is personalized education on camera settings and composition. In practice, that usually means you’re not stuck with one magic camera setting. You’ll learn how to think in a repeatable way: how to set exposure, how to frame a subject cleanly, and how to adjust as the light changes.
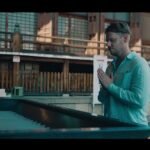
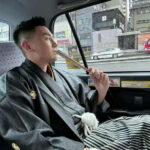
The guide’s approach is also important. In guests’ stories, photographer Irven is praised for taking his time and explaining what’s happening at each stop. That kind of commentary helps you photograph the scene, not just the landmark.
If you’re using a phone: the lessons still apply
You don’t need a fancy setup for this to be useful. One guest noted they shot with an iPhone, and still found the techniques and suggestions helpful. Even if your phone camera is doing most of the work, composition principles still matter—and learning what to look for (angles, subject placement, keeping clutter down) improves your results fast.
If you’re using a DSLR or mirrorless: expect hands-on thinking
If you already understand basic exposure concepts, you’ll likely enjoy the session even more. The tour is structured to help you apply that knowledge in real locations where settings actually matter—especially at night.
What to bring (and how to plan your gear time)
The tour doesn’t include a camera or a tripod, so you’ll want to decide what you’re traveling with.
Here’s a smart way to think about it:
- If you’re bringing a camera, make sure you’re comfortable switching modes and adjusting key settings.
- If you’re planning long exposures, consider bringing a tripod (or a small support you can improvise), because stabilization can be the difference between crisp neon and a smeared mess.
- If you’re shooting on a phone, bring the right charging solution and think about whether you’ll need a steady support for longer shutter times.
Also, the tour can start and move with your needs. One story mentioned the guide asked if the group could start early, and the session was extended. That’s a good sign: the guide is paying attention to timing and trying to maximize your shooting window.
Price and value: is $170 worth a 3-hour private lesson?
For some tours, $170 buys you a route and a guide’s patter. Here, the price is more about learning time.
You’re getting:
- a private structure (so you’re not sharing attention)
- instruction from a professional photographer guide
- a local guide who knows where to stand and what the scene is doing
If you want photos that look like you planned them—especially night neon shots—this kind of coaching often saves you time. Without guidance, you might spend hours roaming Dotonbori trying settings that are close but not right. With coaching, you can test, adjust, and improve in the moment.
It’s also easier to justify the cost if you:
- care about photography enough to ask questions
- want specific outcomes (cleaner compositions, better night exposure)
- are traveling with a camera you actually use
Who this tour suits best (and who might feel underwhelmed)
This masterclass is a strong fit if you want a practical photography course in real Osaka settings. You’ll likely enjoy it if you:
- want to photograph street scenes and neon with better control
- prefer learning from a person who can watch your framing and help you fix it
- like structure but still want flexibility to move at your pace
You may feel less satisfied if you’re mostly after casual sightseeing with a few photos, because the tour is geared toward teaching. It also helps if you show up with at least a basic understanding of how your device shoots—though instruction is part of the program, knowing your camera basics can make the learning curve faster.
Should you book Osaka Photography Masterclass?

I’d book this if Osaka’s neon and night streets are on your must-shoot list and you want more than luck. The day tour helps you build composition and daylight control in Shinsekai and Tsutenkaku, and the night tour is built for long exposure practice in Dotonbori. The private format matters a lot, and the repeated praise for photographer Irven’s time, explanations, and scene-reading is exactly what you want from a photography guide.
If you’re short on time, this one also makes sense because it’s only about 3 hours, but it still targets high-impact areas. My only caution: don’t arrive without thinking about your gear. Since the camera and tripod aren’t included, you’ll get the most out of the session if you’re ready to shoot from minute one.
FAQ
FAQ
How long is the Osaka Photography Masterclass?
It lasts about 3 hours.
Is this tour private or shared?
It’s a private tour/activity, and only your group participates.
Where does the tour start and end?
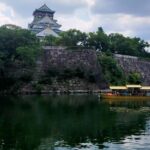
It starts at 3-21 Ōsakajō, Chuo Ward, Osaka, 540-0002, Japan, and it ends back at the meeting point.
Do I get to choose between a day tour and a night tour?
The experience is offered as a Day Tour and a Night Tour, with different focus areas and techniques.
What areas are covered during the day tour?
The day tour goes from Shinsekai (including Tsutenkaku Tower) to Dotonbori, known for neon signs and distinctive architecture.
What areas are covered during the night tour?
The night tour is centered on Dotonbori, where you can practice long exposure and night photography with neon lights and reflections.
Is a camera or tripod included?
No. A camera and a tripod are not included.
What’s included in the price?
The tour includes a local guide, a professional photographer guide, and the private tour.
Is there free cancellation?
Yes. Free cancellation is available up to 24 hours in advance for a full refund.