REVIEW · OSAKA
Private Vibrant Night Photoshoot Experience in Osaka (Dotonbori)
Book on Viator →Operated by Mina Zaki · Bookable on Viator
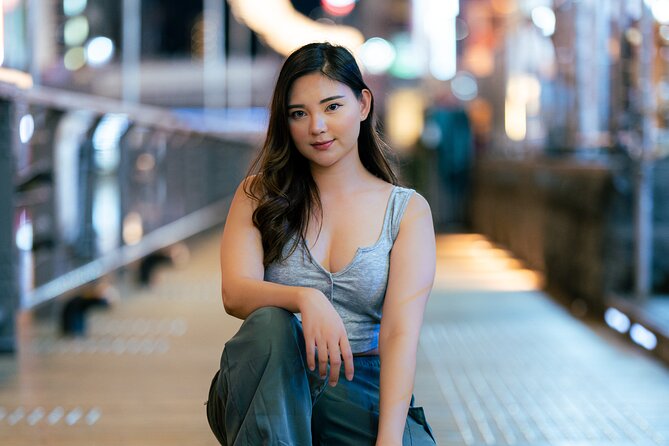
Neon streets can be tough to photograph. This private Osaka night session turns Dotonbori into a photo plan with guided stops and fast posing help. You’ll end with 30 edited photos from the night, plus lots of extra images in standard JPG so you can pick your favorites. One thing to note: you’ll want to arrive ready to walk—this is built for moving between about five spots in about 1.5 hours.
What I like most is the structure. You’re not just taking pics at the big landmarks—you’re also hitting less-crowded streets, including Hozenji Yokocho, where the lantern glow looks great on camera. The other win is Mina Zaki’s hands-on direction: you get specific pose suggestions so you look natural in the neon instead of stiff. A possible drawback is that the final turnaround (aimed at within 24 hours) can slip during busy seasons.
If you’re doing Osaka for the first time, this is an easy way to get iconic images without wasting your night hunting for the best angles yourself. Since it’s private, the pacing can follow your comfort level, and the itinerary can be adjusted if you have a specific vibe or place in mind.
In This Review
- Key highlights at a glance
- Dotonbori at night: why this photo plan works
- The 90-minute route: five stops, no wasted time
- Start area: meet and get your bearings quickly
- Landmark shots early enough to keep you energized
- Add quieter streets for variety
- Hozenji Yokocho for texture and lantern glow
- Glico Sign and Ebisubashi Bridge: the iconic Osaka frames
- Glico Sign: bright, graphic, and camera-friendly
- Ebisubashi Bridge: the heart of the night energy
- Hozenji Yokocho and the quieter lanes: photos with atmosphere
- Why these smaller streets give better variety
- “Less crowded” isn’t a luxury—it’s a photo upgrade
- Pose coaching: why it changes the whole result
- What you get: edited JPGs, extra images, and download timing
- Included photo files
- Delivery timeline
- RAW files cost extra
- Value check: is $130.64 a good deal?
- Who should book this Osaka night photoshoot
- How to make your shoot smoother in Osaka at night
- Wear shoes you can walk in
- Plan for neon contrast
- Bring a vibe, not just a request
- Don’t overpack your goals
- Should you book it?
- FAQ
- How long is the private photoshoot in Dotonbori?
- What photos do I receive after the session?
- Do I get RAW files included?
- How long can I download the photos?
- Is this a private tour and can I bring a service animal?
- What’s the cancellation window for a full refund?
Key highlights at a glance
- About five photo locations in roughly 90 minutes, paced for night shooting
- Glico Sign and Ebisubashi Bridge as the main landmark photo moments
- Hozenji Yokocho plus quieter Dotonbori streets with lantern-lit charm
- Pose coaching so you look good fast, even if you hate being photographed
- ~200 standard images per hour and 30 professionally edited JPGs
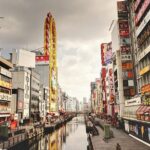
Dotonbori at night: why this photo plan works
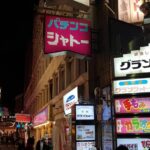
Osaka’s Dotonbori is one of those places where the lights look amazing… until you’re the one holding the camera. Night photos are unforgiving. People move, backgrounds get messy, and neon reflections can turn your shots into blurry messes.
This private photoshoot solves that with a simple goal: get you to the right spots in the right order, with a photographer who knows how to frame Dotonbori’s famous signs and the quieter lanes that sit just a few steps away. You’re not standing around waiting for perfect conditions—you’re moving with purpose, so you actually get results in the time you have.
I also like that the session is flexible. The plan is built around about five locations, but you can adjust if you have a specific vision or target spot. That matters if you’re chasing a particular aesthetic—more neon sign energy, more old-school alley vibes, or a mix.
You can also read our reviews of more private tours in Osaka

The 90-minute route: five stops, no wasted time
The session runs about 1 hour 30 minutes, and the “about five locations” approach is the sweet spot for a night shoot. Too many stops and you spend your energy walking. Too few and you feel like you only got one good angle.
Here’s how the flow typically makes sense:
Start area: meet and get your bearings quickly
You’ll meet at 1-chōme-10-3 Dōtonbori, Chuo Ward, Osaka, 542-0071. From there, you’re off into the Dotonbori action. The meeting point being in the district is a win, because you’re not spending your session transferring between neighborhoods.
Landmark shots early enough to keep you energized
The big signs are best when you’re still fresh. You’ll visit the Glico Sign and the Ebisubashi Bridge area as key photo moments. These are high-contrast, high-energy areas, which means you’ll want time to test angles and get clean compositions before you feel rushed.
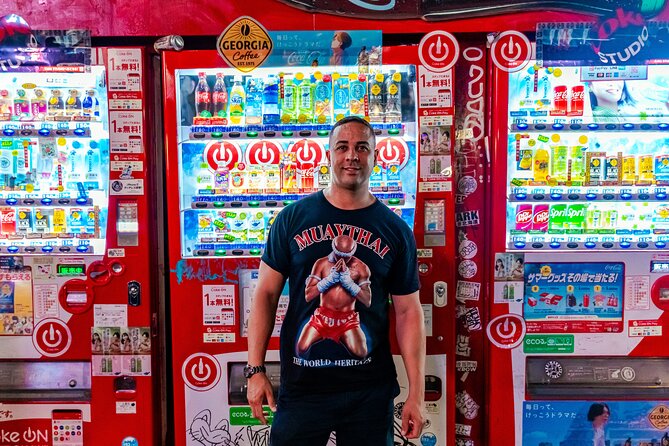
Add quieter streets for variety
A big part of the appeal here is that you’re not only doing the “postcard set.” You also get hidden streets in Dotonbori that are less crowded. That gives your photos breathing room. Neon still shows up, but your frames look less chaotic and more intentional.
You can also read our reviews of more evening experiences in Osaka


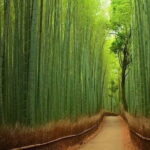
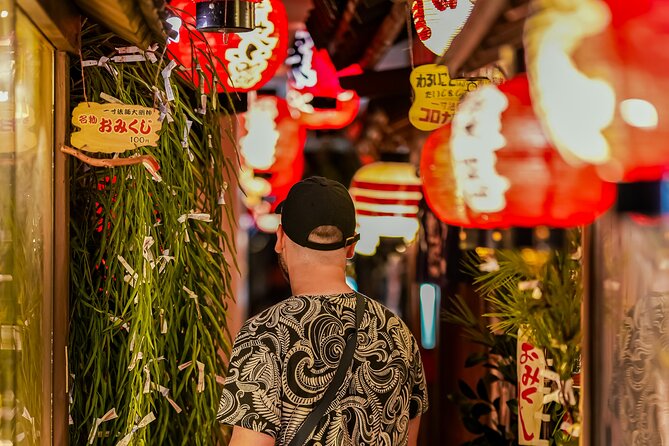
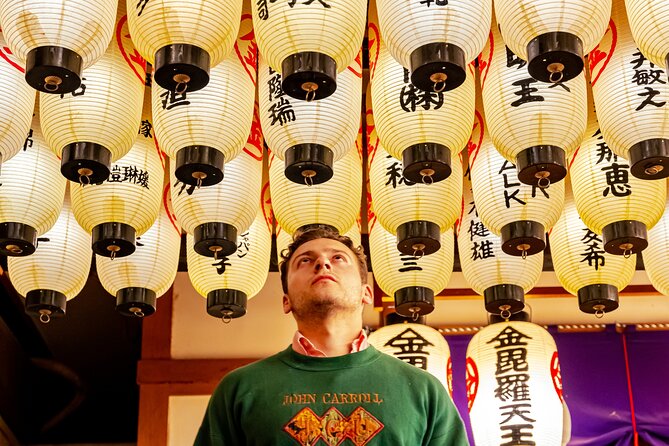
Hozenji Yokocho for texture and lantern glow
You’ll also hit Hozenji Yokocho, known for its traditional alley feel and lantern-lit charm. Night photography loves texture—stone walls, warm lantern tones, and narrow lanes that naturally frame you.
Practical tip: Dotonbori at night can be crowded. The “less crowded” streets are the difference between photos where you look like part of the scene and photos where you look like you’re fighting for space.
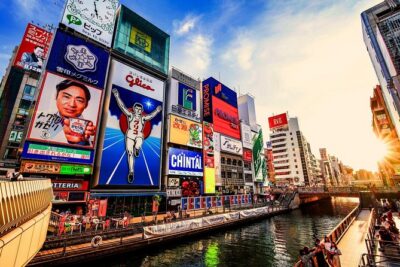
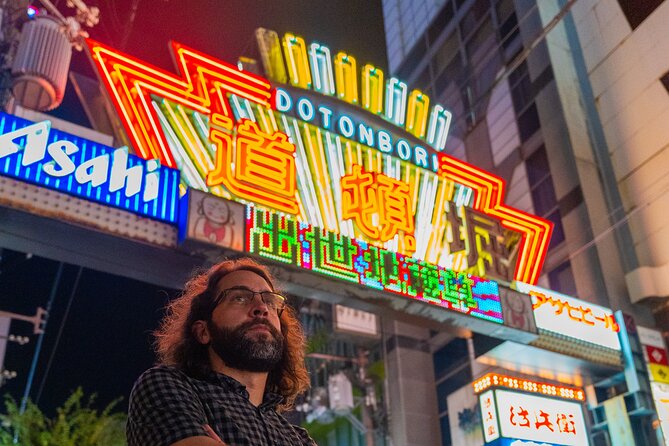
Glico Sign and Ebisubashi Bridge: the iconic Osaka frames

If you’re going to photograph Dotonbori, the Glico Sign and the Ebisubashi Bridge are the main event. These are the places you recognize instantly, even if you’ve never been to Osaka. So it makes sense that your shoot includes them.
Glico Sign: bright, graphic, and camera-friendly
The Glico Sign is basically neon typography in real life. That makes it ideal for portraits because it creates a strong backdrop—your subject pops against the light. Mina’s job here is to keep your framing clean and your poses natural so you don’t end up with half-cropped signs or unreadable compositions.
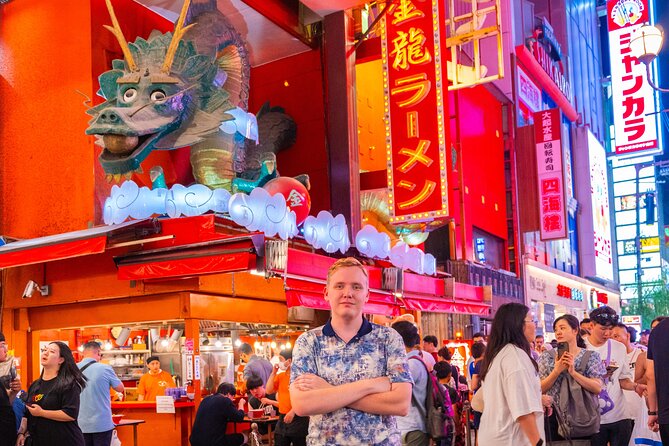
Ebisubashi Bridge: the heart of the night energy
The Ebisubashi Bridge area is where the district feels like Osaka. You get that layered night look: lights, reflections, and a sense of motion. The key challenge is not to overfill your photo with random background clutter.
This is where having a private photographer helps a lot. Instead of you trying to guess angles while people stream past, you’re guided to the spots and directions that look best on camera.
Hozenji Yokocho and the quieter lanes: photos with atmosphere
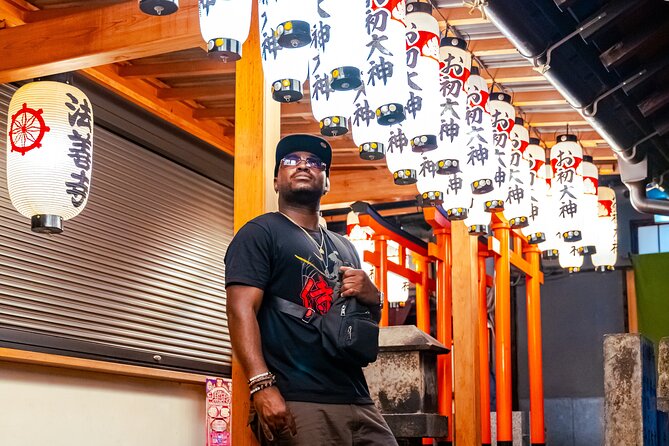
If you want your Osaka photos to feel more than just landmark snapshots, the alley stops matter. Hozenji Yokocho is the perfect example. Narrow lanes, lantern lighting, and that traditional feel create a different mood than the giant neon billboards.
Why these smaller streets give better variety
In a typical self-guided night walk, you bounce between landmarks and end up with photos that all look the same. Here, the quiet lanes and Hozenji add contrast:
- One set looks like neon poster energy (Glico, bridge area).
- Another set looks warmer, more intimate, and more “you were really there.”
“Less crowded” isn’t a luxury—it’s a photo upgrade
Crowds mess with night photos in three ways: background clutter, blocking your angles, and constant movement near your subject. Choosing less crowded streets lets you keep your subject sharp and your background readable.
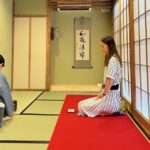
Pose coaching: why it changes the whole result
Here’s the part people often underestimate: being a good photographer is only half the job. Being able to get you comfortable fast is the other half.
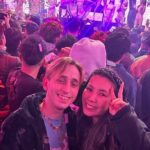
Mina’s style is hands-on. You get posing advice so you know what to do with your hands, how to stand, and how to move so the neon doesn’t exaggerate awkward angles. If you’ve ever taken a selfie in bad lighting and thought, I look tired, this is the fix.
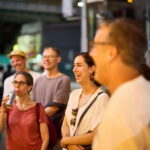
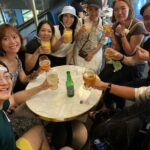
From the feedback shared about the experience, the common theme is that Mina stays friendly and professional while also giving direction that makes the photos look better than you could get on your own. He’ll help you feel at ease and guide you through quick adjustments on the spot.
And because it’s private, you’re not competing with other groups for attention, space, or timing. That means you can actually try a few options without feeling rushed.
What you get: edited JPGs, extra images, and download timing
The deliverables are straightforward, and the numbers are worth paying attention to.
Included photo files
- All photoshoot images (about 200 per hour) in standard-quality JPG format
- 30 professionally edited, high-quality JPG photographs
- Photos are downloadable for 2 weeks after the link is sent
So you’re not stuck with only a small set. You get a larger base of images, then a polished set with edits.
Delivery timeline
They aim to deliver edited photos within 24 hours, but delays can happen during busy seasons. If you need the photos for a trip recap the next day, give yourself a buffer. If you’re just building memories for later, this timing is still very reasonable.
RAW files cost extra
RAW files are not included. If you want RAW, it’s ¥10,000 per booking. Since RAW is more about editing control on your own computer, most people are fine with JPG unless you’re a serious photographer.
Value check: is $130.64 a good deal?
At $130.64 per person for about 1.5 hours, this sits in the “pay for results” category. You’re not paying for a sightseeing guide. You’re paying for:
- access to the best frames in Dotonbori at night
- pose coaching that makes your subject look right in neon lighting
- a curated path through about five locations so you don’t waste your time
To judge value, compare what you’d otherwise do:
- You could walk around Dotonbori yourself and take photos, but you’ll likely miss angles, struggle with crowds, and end up with a smaller set of usable shots.
- You could hire a photographer just to shoot, but you’d still need someone to direct you to the best spots and keep you on schedule.
Here, the package includes a practical mix: you get a lot of images, plus a smaller set that’s polished. The download window is short enough to keep things efficient, but long enough that you can pick your favorites and organize them.
One more cost note: private transportation isn’t included, so plan to handle getting to and from the meeting point on your own.
Who should book this Osaka night photoshoot
This is a strong match if:
- You want iconic Dotonbori photos without spending your night map-reading
- You don’t love posing, and you want real direction
- You’re traveling solo and still want a fun, guided experience with someone focused on helping you get good shots
- You care about variety: neon landmarks plus lantern-lit alley texture
It’s less ideal if:
- You want a slow, free-form walk where you stop whenever you feel like it
- You’re bringing your own gear and expect a long, technical, hands-on photography workshop (this is a portrait shoot with delivery of edited photos, not a camera class)
How to make your shoot smoother in Osaka at night
You can’t control the lights, the crowd level, or how fast the city moves—but you can make the experience easier.
Wear shoes you can walk in
You’ll be moving between multiple locations in 90 minutes. If you’re thinking about heels, reconsider.
Plan for neon contrast
Night lighting can make skin look different than you expect. Follow pose guidance and trust the process. Neon is harsh; good framing matters.
Bring a vibe, not just a request
If you tell Mina you want a specific look—more lantern warmth, more sign energy, more street-style—your photos will feel more cohesive when you review them later. The itinerary can be adjusted, so give clear preferences.
Don’t overpack your goals
The session is about getting quality photos from about five stops. If you try to cover the entire district, you’ll dilute results.
Should you book it?
If you want Osaka memories that actually look like Osaka—neon signs, bridge energy, and lantern alleys—and you’d rather have someone else handle positioning and posing, this is a smart booking. The pricing makes sense for the time, the private attention, and the mix of standard JPGs plus 30 professionally edited images.
Book this when your priority is photos you’ll keep. Skip it if your priority is slow sightseeing or if you only want casual phone snapshots.
If you want one practical decision rule: if you’d pay to hire someone to direct you for 90 minutes so you don’t waste your night, this one is worth it.
FAQ
How long is the private photoshoot in Dotonbori?
It’s about 1 hour 30 minutes and you’ll visit approximately five photo locations.
What photos do I receive after the session?
You’ll receive all photoshoot images (about 200 per hour) in standard-quality JPG, plus 30 professionally edited high-quality JPG photographs.
Do I get RAW files included?
No. RAW files are not included. They cost ¥10,000 per booking.
How long can I download the photos?
After the link is sent, the photos are downloadable for 2 weeks. After that, they’ll be deleted.
Is this a private tour and can I bring a service animal?
Yes. It’s private, so only your group participates. Service animals are allowed.
What’s the cancellation window for a full refund?
You can cancel for a full refund up to 24 hours in advance. If you cancel within 24 hours of the start time, the amount paid isn’t refunded.