REVIEW · OSAKA
Japan eSIM (3 to 30 days, up to 60GB)
Book on Viator →Operated by Xplori · Bookable on Viator
A good connection is half the trip. This Japan eSIM keeps you in touch with 4G/5G data and helps you find your way around town, with fast QR activation by email. My favorite part is the simple setup flow, and the main drawback is you’ll need an eSIM-compatible phone (and sometimes you may need a quick nudge from support to activate smoothly).
I also like that you can pick the duration—3 to 30 days—so you’re not paying for more time than you’ll use. And because it covers Japan broadly (not just one city), you can use it for day trips and moving around without planning a new SIM every time you change plans.
One more consideration: high-speed data has a limit. After you hit your allowance, speeds drop to 3G, which is great for basics but not the same as full-speed streaming.
In This Review
- Key Highlights at a Glance
- Why This Osaka-to-Whole-Japan eSIM Makes Sense
- Getting Your eSIM Before You Land (No Counter, No Stress)
- Activation on iPhone and Android: What You Should Expect
- Data Duration: 3 to 30 Days (and Picking the Right Fit)
- 4G/5G in Japan: What You Gain for Real Travel
- The Big Tradeoff: High-Speed Data Cap, Then 3G
- Practical Uses in Osaka: Navigation and Staying Connected
- Value Check: How $5 Fits Into the Bigger Picture
- Who This eSIM Is Best For
- Should You Book This Japan eSIM?
- FAQ
- Does this eSIM arrive digitally or in a physical package?
- How do I activate the eSIM?
- Which phones support this eSIM?
- What data speeds do I get, and what happens after the allowance?
- How long can I use the eSIM?
- Can I cancel if my plans change?
Key Highlights at a Glance

- QR code activation via email so you can get connected in minutes after ordering
- 4G/5G where available for maps, messaging, and travel planning
- 3–30 day options that match short trips and longer stays
- Covers all Japanese provinces for moving beyond Osaka
- High-speed data cap then speeds switch to 3G
- Strong value versus airport SIMs thanks to faster setup and fewer language hassles
Why This Osaka-to-Whole-Japan eSIM Makes Sense
If your plan is mostly Osaka (plus a couple side trips), an eSIM is one of the least stressful ways to stay connected. You’re not hunting for a physical SIM counter after landing, and you’re not stuck sorting through unfamiliar steps while jet-lagged.
I like that this isn’t framed as a local-only thing. The plan covers all Japanese provinces, which matters because Japan travel usually grows legs. One day you’re in Osaka, the next you’re thinking about Kyoto, Nara, or wherever the train takes you.
The other big win is mindset: you can use your phone right away for the stuff that makes travel smoother. Think navigation, trip planning, and staying in touch with friends and family without juggling Wi‑Fi spots.
You can also read our reviews of more tours and experiences in Osaka.


Getting Your eSIM Before You Land (No Counter, No Stress)
This is a purely digital product. After you order, the eSIM is sent to your email, and you activate it by scanning a QR code. That timing is the real value: you’re not paying more money and then adding friction during arrival chaos.
The activation promise is pretty clear: you scan the QR code, then you get connected within minutes. In practical terms, that means you can land, grab your bearings, and start pulling up transit info without waiting for airport staff.
One practical tip I’d give you: if you have a long travel day, activate your eSIM once you’re on stable Wi‑Fi before you really need it. Even if it works instantly, doing a quick check early can save you from scrambling on day one.
Activation on iPhone and Android: What You Should Expect

Activation is the part where eSIMs can be either effortless or slightly annoying, depending on your phone. This one is designed for a straightforward flow: scan the QR code, activate the eSIM profile, and connect.
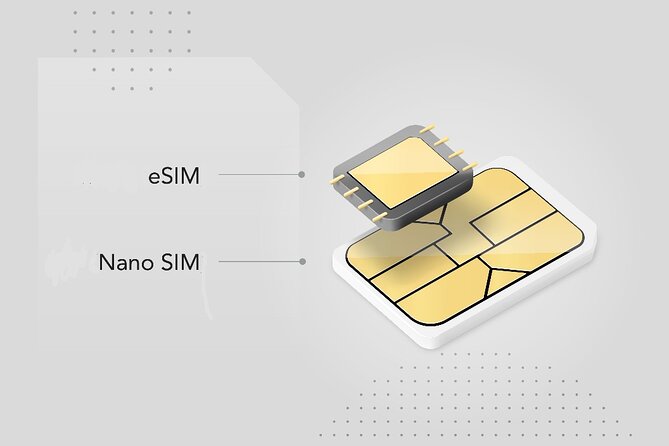
The phone compatibility list is specifically spelled out. You’ll want an eSIM-capable phone, including examples like iPhone XS and later, Pixel 3 and later, and Samsung S20 / S21 / Fold. If your phone isn’t in that zone, you’ll be blocked before you even start—so double-check early.
There’s also a real-world note from one of the experiences shared: setup usually works smoothly, but one activation needed an email to the company on the first day. The key point isn’t to panic—it’s to know support is responsive. In that case, the company answered quickly and got it working.
If you’re the type who hates surprises, do two things:
- Confirm your phone supports eSIM before you leave.
- Keep the provider email handy in case you need help the day you activate.
Data Duration: 3 to 30 Days (and Picking the Right Fit)
The plan options run from 3 to 30 days, which is exactly what you want if your trip length doesn’t match typical one-size SIM products. For short visits, a 3- or 7-day option keeps cost under control. For longer stays, you’re covered without needing to replace anything mid-trip.
One review highlighted the 30-day plan as excellent value and noted that 1.5GB a day is plenty of data for a visit. That lines up with how people actually use phones on travel days: maps, messaging, searching for transit, and planning meals.
Here’s how I’d translate that into your decision-making:
- If you mostly use your phone for Google Maps, ride timing, and chat apps, you’re likely to feel comfortable with the daily allowance.
- If you plan to stream video a lot on the go, expect faster consumption of high-speed data.
Also, the product mentions up to 60GB. The exact mix depends on the plan you choose, so when you pick your duration, think about your usage style, not just your itinerary length.
4G/5G in Japan: What You Gain for Real Travel
This eSIM offers 4G/5G (where available) data at local rates. That phrase matters more than it sounds. It’s not just about having internet—it’s about having enough speed and reliability for the things you’ll lean on repeatedly.
In Japan, that usually means:
- checking train schedules and transfers,
- pulling up station exits and walking directions,
- using translation tools when you need them,
- staying connected without constantly hunting for Wi‑Fi.
Because the coverage is described as spanning all Japanese provinces, you’re not stuck planning your data use tightly to Osaka only. You can move beyond the city without changing plans.
And if you’re the type who uses your phone as your main travel tool—tickets, maps, notes—this is the kind of setup that makes your trip feel calm.


The Big Tradeoff: High-Speed Data Cap, Then 3G
This is the part you should read and respect: high-speed data is capped, and after that, the speed switches to 3G. The good news is that 3G still keeps you connected for basics.
So what does that mean for you day-to-day?
- Messaging apps, basic browsing, and navigation can still work fine.
- If you rely on high-bandwidth stuff like streaming video or heavy photo uploads, you’ll notice the difference.
- Even with 3G, you can usually plan your next stop, check transit, and communicate with people back home.
My practical advice: treat the high-speed allowance like your travel-day fuel. Use it heavily at the moments you need it—finding the right train, confirming a schedule, checking where you are—then trim back later if you’re running low.
If you’re traveling for a full month, I’d still rather have dependable data with a clear cap than gamble on spotty public Wi‑Fi.
Practical Uses in Osaka: Navigation and Staying Connected
Even though this is not a sightseeing tour with stops, it’s still a “route” of sorts: the moment you land, your phone becomes your guide. That’s what this eSIM is built for.
The description focuses on two key needs:
1) staying connected with friends and family, and
2) finding your way around town.
In Osaka, where signage, station layouts, and transfer options can be tricky, having data for navigation can save you time and stress. You’re not stuck bouncing between offline maps and Wi‑Fi. You can verify your route on the fly.
I also like the “no language barriers” angle. Airport SIM purchases can become a mini scavenger hunt if you’re dealing with unfamiliar booths and fast-talking staff. With an eSIM sent by email, your setup happens on your own schedule.
Value Check: How $5 Fits Into the Bigger Picture
At $5.00 per person, this is positioned as cheaper than buying a SIM at the airport. That’s not just about the dollar amount. It’s about time and friction.
Airport SIMs can cost more, and the bigger cost is often your energy:
- waiting in line,
- translating what the staff need,
- figuring out activation steps while you’re already tired.
With this eSIM, you’re doing the work at home or wherever you have time. You receive it by email, scan the QR code, and connect within minutes.
One more value detail: the reviews describe the 30-day plan as great value and specifically call out that the daily data allowance is enough. If that matches your travel style, this can be one of the simplest “set it and forget it” purchases you’ll make.
Who This eSIM Is Best For
This is a strong fit if you:
- want data for navigation and quick travel planning,
- plan to stay connected without relying on Wi‑Fi,
- have an eSIM-compatible phone,
- are traveling for anywhere from a short weekend to several weeks.
It’s less ideal if you:
- don’t have an eSIM phone and can’t switch devices,
- want unlimited high-speed data for heavy streaming the whole trip,
- hate troubleshooting and want zero chance of needing help if activation is delayed.
Most people fall into the first group. For many travelers, the goal is simple: get connected fast and stop thinking about it.
Should You Book This Japan eSIM?
Book it if your priority is easy connectivity in Japan—especially in and around Osaka—and you like the idea of activating via email + QR code before you deal with arrival headaches. The fact that it covers all Japanese provinces makes it feel future-proof for day trips too.
Skip it (or reconsider) if you know you’ll use lots of high-bandwidth data every day. The high-speed cap and then 3G is the tradeoff, and you’ll feel it if your phone becomes a cinema during transit.
My bottom line: if you can confirm your phone supports eSIM and you’ll mainly use data for navigation and staying in touch, this is the kind of purchase that quietly improves every day of your trip.
FAQ
Does this eSIM arrive digitally or in a physical package?
It’s a purely digital product. You receive it by email after you order, then activate it by scanning the QR code.
How do I activate the eSIM?
You scan the QR code and activate the eSIM profile. The description says you can be connected within minutes after activation.
Which phones support this eSIM?
The info lists examples like iPhone XS and later, Pixel 3 and later, and Samsung S20 / S21 / Fold. You should double-check your phone supports eSIM.
What data speeds do I get, and what happens after the allowance?
You get 4G/5G (where available) at local rates. High-speed data is capped at your plan amount, and after that the speed switches to 3G.
How long can I use the eSIM?
You can choose options from 3 to 30 days depending on your trip length.
Can I cancel if my plans change?
Yes. There is free cancellation up to 24 hours before the experience start time for a full refund.