REVIEW · OSAKA
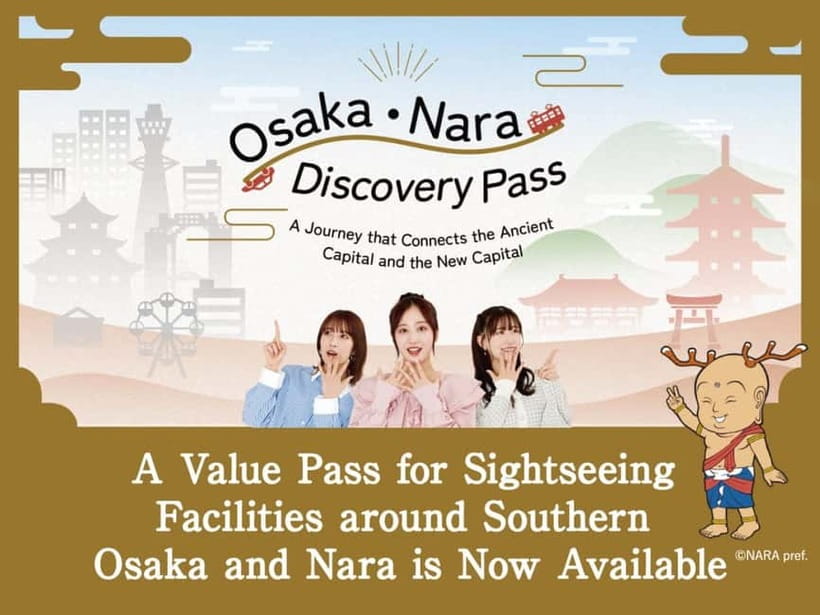
Osaka-Nara: 2-Day Discovery Pass
Book on GetYourGuide →Operated by LINKTIVITY Inc. · Bookable on GetYourGuide
Osaka and Nara, packed into one pass
This two-day discovery pass is built for easy planning: one QR code, lots of free-entry attractions, and a clear northern vs southern route choice. What makes it interesting is the way it mixes big Osaka viewpoints with classic Nara temples—and then throws in quirky side stops like the Nara Goldfish and Reptile museums.
I like the value math when you’re serious about visiting multiple sites. It’s priced at $24 per person, and the pass covers a long list on both routes (17 attractions on the Northern Route and 19 on the Southern Route), with only one free entry per facility. I also like the setup at HEP FIVE Mall, since it’s surrounded by food and entertainment while you’re moving between stops.
The main drawback is the fine print on timing. Some free entries only work before specific cutoffs (notably Umeda Sky), you can’t re-enter the same place, and you must wait at least 30 minutes between entering different facilities.
In This Review
- Key things to know before you go
- How the Osaka-Nara Discovery Pass Works (QR code, timing, and entry rules)
- Northern Route: Umeda Sky Building, Tsutenkaku, and HEP FIVE views
- Start at HEP FIVE Mall base
- Don’t plan around the Ferris wheel on Aug 7
- Osaka water + cruising energy
- Nara side: temples, art stops, and the quirky museums
- Southern Route by rental car: Kishiwada, hot springs, and cave fun
- Start with the cycling angle and local culture
- Kishiwada Castle and Sumo Museum energy
- Temples and Nara’s quieter stops
- Hot springs and the Menfudo limestone cave monorail
- Planning Your Two Days: the 5:00 PM cutoff and the 30-minute rule
- The Umeda Sky Building cutoff can change your whole day
- Build in buffer time for the 30-minute rule
- Every facility is one-and-done
- Price and logistics: is $24 actually good value?
- Public transportation is not included
- The pass is not a full 48 hours from first use
- Who gets the best deal
- Where to start: HEP FIVE as your Osaka hub
- Should you book the Osaka-Nara Discovery Pass?
- FAQ
- What is included in the Osaka-Nara Discovery Pass?
- How much does it cost?
- Which areas does the pass cover?
- Are public transportation costs included?
- Do I need a rental car for the Southern Route?
- Can I visit the same attraction more than once using the pass?
- Are there timing limits for free admission?
- Is the pass valid for a full 48 hours?
- What happens on August 7th with the HEP FIVE Ferris Wheel?
- Until when is the pass valid?
Key things to know before you go
- One QR code, many free entries: You get one free entry per listed facility, using the pass QR.
- Timing rules are strict: Free admission windows (like before 5:00 PM) can change your best route.
- No re-entry to the same facility: Plan your day like you’re choosing restaurants, not sampling menus.
- Two routes, different realities: Northern Route fits typical city touring; Southern Route requires a separate rental car booking.
- Transit costs are on you: Trains and buses aren’t included unless you choose specific combo options.
How the Osaka-Nara Discovery Pass Works (QR code, timing, and entry rules)
This pass is all about free entry with one digital QR. For each attraction on your chosen route, you can use the pass for one free entry, and that’s it. No “one more time later,” no “just one quick peek again.” The rules are simple but not forgiving.
Here’s the part that affects your schedule the most:
- You must wait at least 30 minutes after visiting one facility before you enter another.
- Re-entry to the same facility isn’t allowed.
- Free entry for each facility is allowed once within the two-day window, and it’s limited to the day of use.
- The pass is valid from a facility’s opening time to the final entry time on the day of use, and then it continues for the following day—but it is not valid as a full uninterrupted 48 hours starting from the first scan.
There’s also a practical tip that matters more than you’d expect. The instructions say please disable dark mode. That’s often a QR-reading issue, so you’ll want the pass to display clearly when you get to ticket gates.
One more rule is unusual: all participants are required to use the facilities collectively; individual use is not allowed. I’d treat that as a “tour-style” requirement even though you’re using a self-guided pass. When you plan, assume you may need to stick close to the group flow instead of hopping off alone for quick stops.
You can also read our reviews of more tours and experiences in Osaka
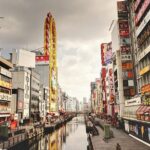
Northern Route: Umeda Sky Building, Tsutenkaku, and HEP FIVE views
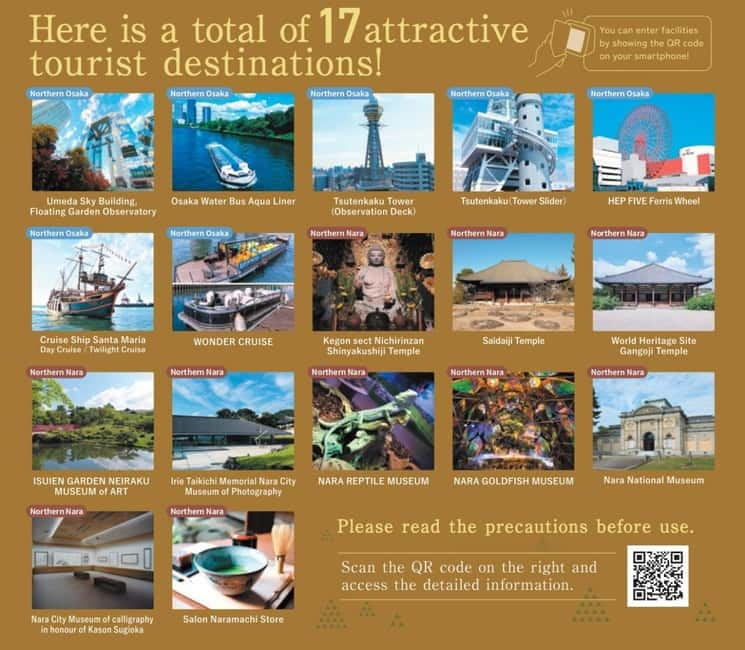
If you want a first day that feels like Osaka and a second day that feels like Nara, the Northern Route is the cleaner storyline. It includes major Osaka landmarks plus a long list of Nara attractions.
Start at HEP FIVE Mall base
The pass is located in HEP FIVE Mall, which is helpful because you’ll have somewhere easy to eat and recharge between stops. It also makes it simpler to get your bearings fast around Umeda.
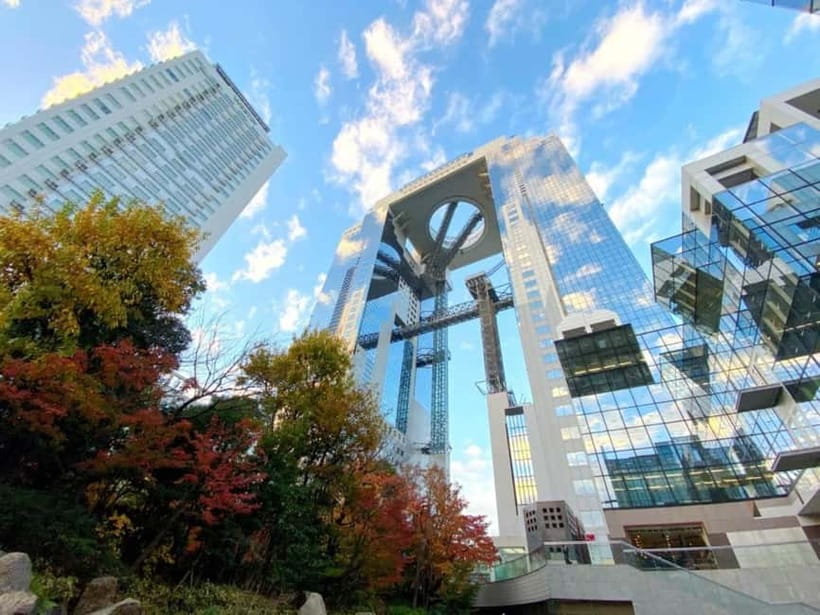
From there, the headliner is Umeda Sky Building. The pass includes free admission to the Floating Garden Observatory, but only before 5:00 PM. That means if you want the views without paying, build your Umeda stop earlier in the day. If you arrive later, the free window may be gone, and you could end up paying most of the ticket cost anyway.
A second big Osaka stop is Tsutenkaku Tower—including the observation deck, plus Tsutenkaku (Tower Slider). It’s one of those places that’s easy to understand from a distance: you see it, you go, and you get the moment. If you’re the type who likes your days with a mix of scenery and something a little playful, this fits.
Don’t plan around the Ferris wheel on Aug 7
The pass also includes the HEP FIVE Ferris Wheel. There’s an important notice: due to scheduled inspection, it will be out of service on Thursday, August 7th. Operations resume after inspection, but there is no set time. If you’re visiting around that date, treat the Ferris wheel as optional and don’t stake your schedule on it.
Osaka water + cruising energy
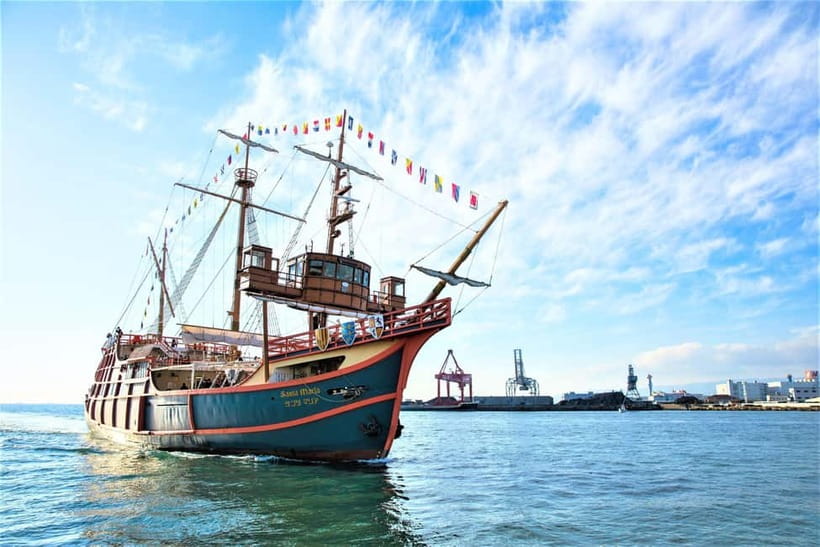
This route adds Osaka Water Bus Aqua Liner, plus cruises like Cruise Ship Santa Maria Day Cruise / Twilight Cruise and WONDER CRUISE. These are great if you want a different way to see the city instead of just riding subways and walking. Also, water-based options tend to help with pacing: you sit, you look, you stop moving for a while.


Nara side: temples, art stops, and the quirky museums
The Northern Route then flows into Nara highlights like:
- World Heritage Site Gangoji Temple
- Kegon sect Nichirinzan Shinyakushiji Temple
- Saidaiji Temple
- ISUIEN GARDEN NEIRAKU Museum of Art
- Irie Taikichi Memorial Nara City Museum of Photography
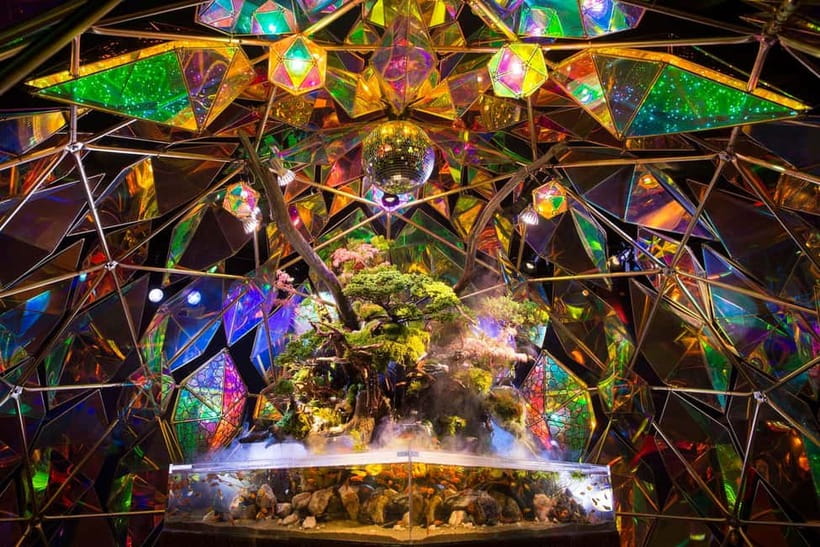
- NARA REPTILE MUSEUM and NARA GOLDFISH MUSEUM
- Nara National Museum
- Nara City Museum of calligraphy in honour of Kason Sugioka
- Salon Naramachi Store
Here’s how I’d interpret these for planning:
- If you want one “main temple moment,” make Gangoji your anchor. It’s labeled as a World Heritage Site, and you’ll feel that status when you plan around the visit.
- If your travel style includes art and museum calm, pairing ISUIEN Garden NEIRAKU with the photography museum gives you variety without forcing another “all-out walking” day.
- If you like light, unusual stops, the reptile and goldfish museums can break the temple rhythm. They’re also good for keeping momentum when you’ve already seen several religious sites.
Southern Route by rental car: Kishiwada, hot springs, and cave fun
The Southern Route is a different beast. The biggest rule: if you choose it, you need to book a rental car separately. Your pass won’t handle that part, and the list includes several places that make more sense with wheels than with trains.
This route is built for a day that looks like:
- museums and historic spots in the morning
- castles and local culture mid-day
- hot springs and countryside sightseeing later
Start with the cycling angle and local culture
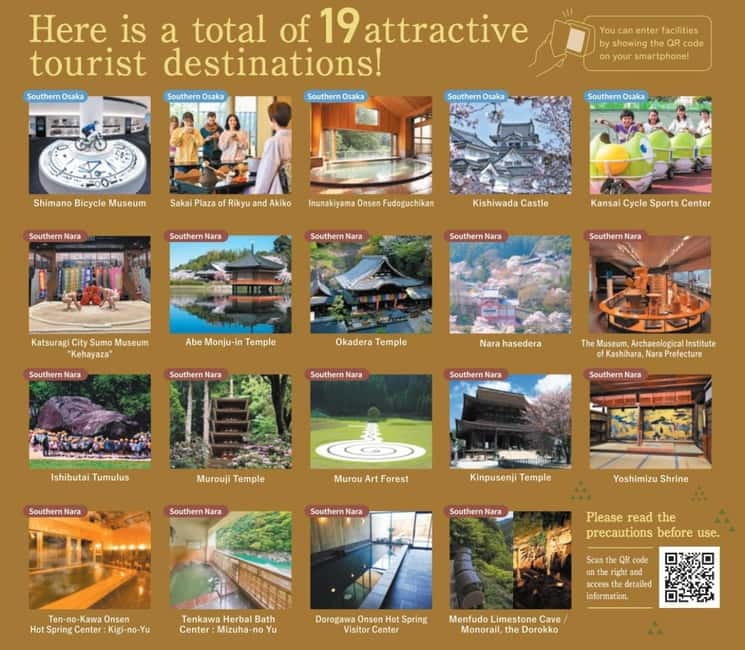
Southern Route includes Shimano Bicycle Museum, plus Sakai Plaza of Rikyu and Akiko, and Inunakiyama Onsen Fudoguchikan. If you’re the type who enjoys niche interests—design, craft, or themed museums—this route gives you that without needing extra ticket shopping.
Kishiwada Castle and Sumo Museum energy
You’ll also hit Kishiwada Castle and Kansai Cycle Sports Center. Add Katsuragi City Sumo Museum “Kehayaza” for a dose of playful local culture, especially if you want something that isn’t another temple gate photo.
Temples and Nara’s quieter stops
From there, the list moves into spiritual and scenic territory:
- Abe Monju-in Temple
- Okadera Temple
- Nara Hasedera
- The Museum, Archaeological Institute of Kashihara, Nara Prefecture
- Ishibutai Tumulus
- Murouji Temple
- Murou Art Forest
- Kinpusenji Temple
- Yoshimizu Shrine
If your idea of a good day includes fewer crowds and more “just drive there and explore,” the Southern Route is a strong match.
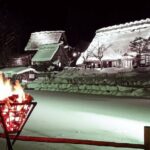
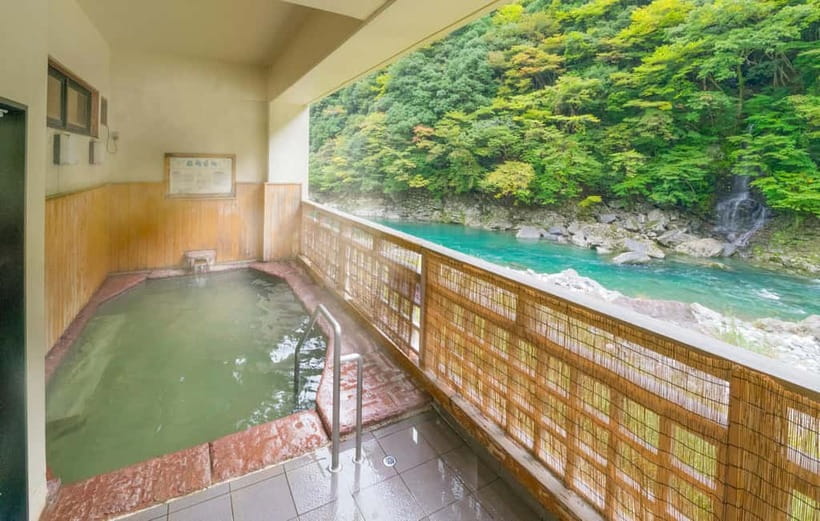
Hot springs and the Menfudo limestone cave monorail
This route gets extra memorable with onsen stops like:
- Ten-no-Kawa Onsen Hot Spring Center: Kigi-no-Yu
- Tenkawa Herbal Bath Center: Mizuha-no Yu
- Dorogawa Onsen Hot Spring Visitor Center
And then there’s Menfudo Limestone Cave / Monorail, the Dorokko. That’s a very specific kind of attraction—good if you want something you can’t copy at home. It also gives you a natural “middle of the day” anchor, which matters because of the 30-minute transfer rule between facilities.
Planning Your Two Days: the 5:00 PM cutoff and the 30-minute rule
Here’s the scheduling reality: the pass wants you to commit to a flow, not bounce randomly.
The Umeda Sky Building cutoff can change your whole day
Free admission for the Floating Garden Observatory is valid only before 5:00 PM. That cutoff can be the difference between a smooth day and a scramble. If your plan is “we’ll see Umeda after dinner,” I’d rethink it. Move Umeda earlier so the pass actually does the heavy lifting.
Build in buffer time for the 30-minute rule
After you enter one facility, you must wait at least 30 minutes before entering another. This means:
- don’t stack places across the street with no buffer
- don’t plan back-to-back ticket gates
- treat the wait like part of sightseeing, not downtime
If your route includes a long list (and both routes do), the 30-minute rule is what forces you to choose what matters most each day.
Every facility is one-and-done
You get free entry once per facility, and re-entry isn’t allowed. So you can’t use the pass to pop in, leave, and come back the same day. I’d also treat anything timed—like cruises or observation experiences—as a “once you miss it, it’s missed” situation.
Price and logistics: is $24 actually good value?
At $24 per person, this pass can be a bargain if you’re hitting multiple paid attractions. The reason is simple: you’re not paying per site; you’re buying a bundle with lots of free-entry targets.
But the value depends on two big constraints from the fine print:
Public transportation is not included
The pass does not cover public transport costs, including trains and buses. So even if the attractions are free, you may still spend on getting between them.
If you’re choosing the combo options, you can reduce that pain:
- With the Osaka-Nara Discovery Pass & Railway Ticket Combo, you get an Osaka Metro & Osaka City Bus Pass (1-Day Ticket).
- Also with the combo, you get a Kintetsu Rail Pass (2-Day Ticket) between Osaka-Namba and Kintetsu-Nara.
So, you get the best value if you plan to use those included routes—or if you already know you’ll pay for transportation anyway.
The pass is not a full 48 hours from first use
The “valid until opening to final entry time” plus “day of use and following day” phrasing means you should scan your schedule around the two-day window carefully. If you start too late on day one, you may feel like day two didn’t get the full benefit you expected.
Who gets the best deal
This works best for you if:
- you’re willing to do several attractions from the list (not just one or two)
- you like structured route planning with fewer decisions each day
- you can respect cutoffs like the 5:00 PM rule for Umeda Sky’s free admission
It’s less perfect if you want total spontaneity, because the pass rules limit re-entry and force spacing.
Where to start: HEP FIVE as your Osaka hub
Starting at HEP FIVE Mall is practical. You’ve got a clear meeting point feel without needing complicated “find your host at Gate 3” stress. Since the mall is surrounded by dining and entertainment, it’s a good place to handle meals and downtime between your next free-entry stop.
I also like using HEP FIVE as a timing checkpoint. If you’re planning Umeda Sky’s pre-5:00 PM free admission, it’s easy to judge your day: get your Umeda observatory visit done early, then let the rest of the afternoon become a mix of Tsutenkaku, cruise options, and the other stops.
For the Southern Route, the “start in a car-friendly way” reality is different. Since you must arrange a rental car separately, build your day around driving time, not just the attractions themselves. The 30-minute rule adds pressure too—so it helps to group sites logically.
Should you book the Osaka-Nara Discovery Pass?
I’d book it if your trip includes several stops from the Northern Route list and/or you’re comfortable structuring your day around cutoffs like the Umeda Sky before 5:00 PM rule. At $24, it’s hard to beat when you’re using it for a cluster of attractions instead of just one big-ticket site.
I’d think twice if you hate timing rules or you plan to roam freely with lots of unscheduled stops. The “one free entry per facility,” “no re-entry,” and “30-minute wait” rules mean the pass rewards planning. And if you’re doing the Southern Route, confirm you really want the rental car day, since that’s not included and it changes the whole vibe of the trip.
If you want a two-day Osaka-to-Nara plan that’s mostly hands-off once you choose your route, this pass can be a smart way to do it.
FAQ
What is included in the Osaka-Nara Discovery Pass?
The pass includes one free entry per listed facility (one free entry per attraction) using the digital QR ticket.
How much does it cost?
It’s listed at $24 per person.
Which areas does the pass cover?
It covers Osaka and Nara with two options: a Northern Route (17 attractions) and a Southern Route (19 attractions).
Are public transportation costs included?
No. Trains and buses (public transportation costs) are not covered in the price.
Do I need a rental car for the Southern Route?
Yes. If you choose the Southern Route, you need to book a rental car separately from your ticket.
Can I visit the same attraction more than once using the pass?
No. Re-entry to the same facility is not allowed.
Are there timing limits for free admission?
Yes. For example, for the Floating Garden Observatory at Umeda Sky Building, free admission with the pass is valid only before 5:00 PM. Also, after visiting one facility you must wait at least 30 minutes before entering another.
Is the pass valid for a full 48 hours?
No. It’s not valid for a full 48 hours from the start of use. It’s valid from each facility’s opening time to the final entry time on the day of use and the following day.
What happens on August 7th with the HEP FIVE Ferris Wheel?
The HEP FIVE Ferris Wheel will be out of service due to scheduled inspection on Thursday, August 7th, and operations resume after inspection with no set time.
Until when is the pass valid?
The provided info lists an expiration date of April 30, 2026.